Affinity Publisher 2 for iPad Quickstart Guide
Welcome to Affinity Publisher 2 for iPad
Upon opening Affinity Publisher, you’re greeted with its Home screen. Use the icons on the left to create, open and manage documents.
Tap New and then New Document to create a blank document. When editing a document, return to the Home screen by tapping the button in the workspace’s top-left corner.
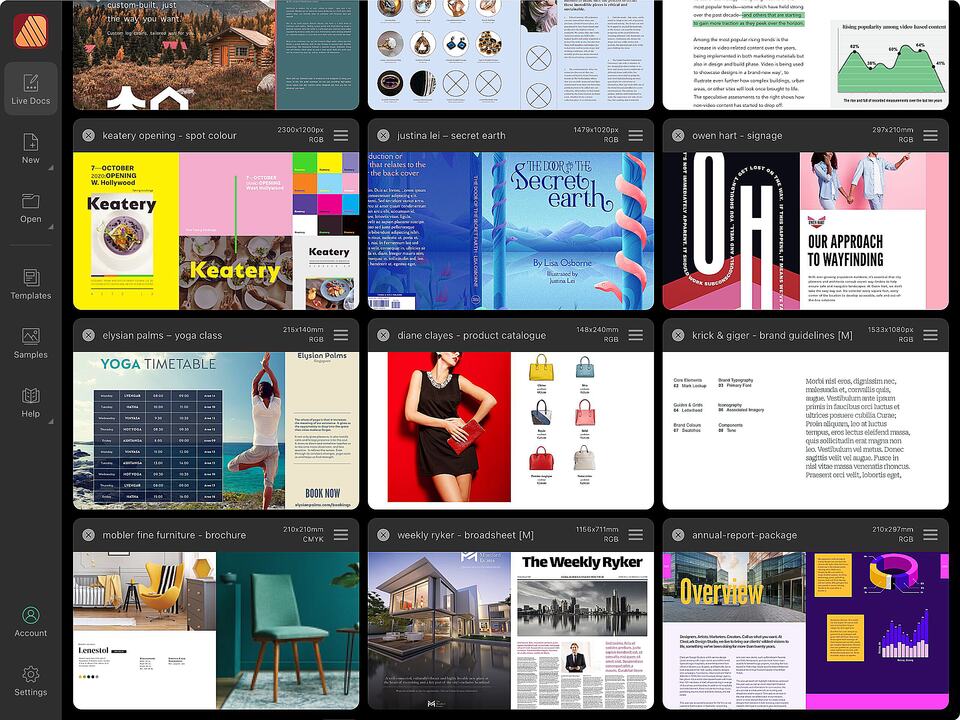
Return to documents you’ve created or opened but not closed by tapping Live Docs. Simply tap one’s thumbnail to continue working on it. You can also save and close documents from here.
If you’ve closed a document, tap Open and then Open Document to navigate to and reopen it. Tap Templates to use an existing document (saved as an .aftemplate file) as the starting point for a new one.
You can also explore professional Samples and get further Help with your app’s features from the Home screen.
Creating a document
On Affinity’s Home screen, tap New and then New Document.
On the New Document dialog, set the document’s dimensions and other attributes by selecting a preset. Affinity Publisher includes comprehensive print, press-ready and screen presets – and you can create your own.
You can customise settings for your document’s page orientation, vertical or horizontal page arrangement, colour format (such as CMYK or RGB) and profile, and margin and bleed measurements.
Workspace
Your workspace is efficient and customisable. Familiar touchscreen gestures are used to interact with the document view and the surrounding interface. For example, you can tap to select an existing object on the page or a tool you want to use, drag to create a new object or position an existing one, and pinch to zoom in or out of the page.
Regularly used commands are always at your fingertips by swiping three fingers down on the document view to reveal the customisable Quick Menu.
Menus at the top left provide access to Personas—modes for different types of task—and common functions such as saving, exporting and layer operations.
At the far right are menus for zoom level and page navigation; preview mode and design aids; snapping options; and hiding the user interface to focus on pages.
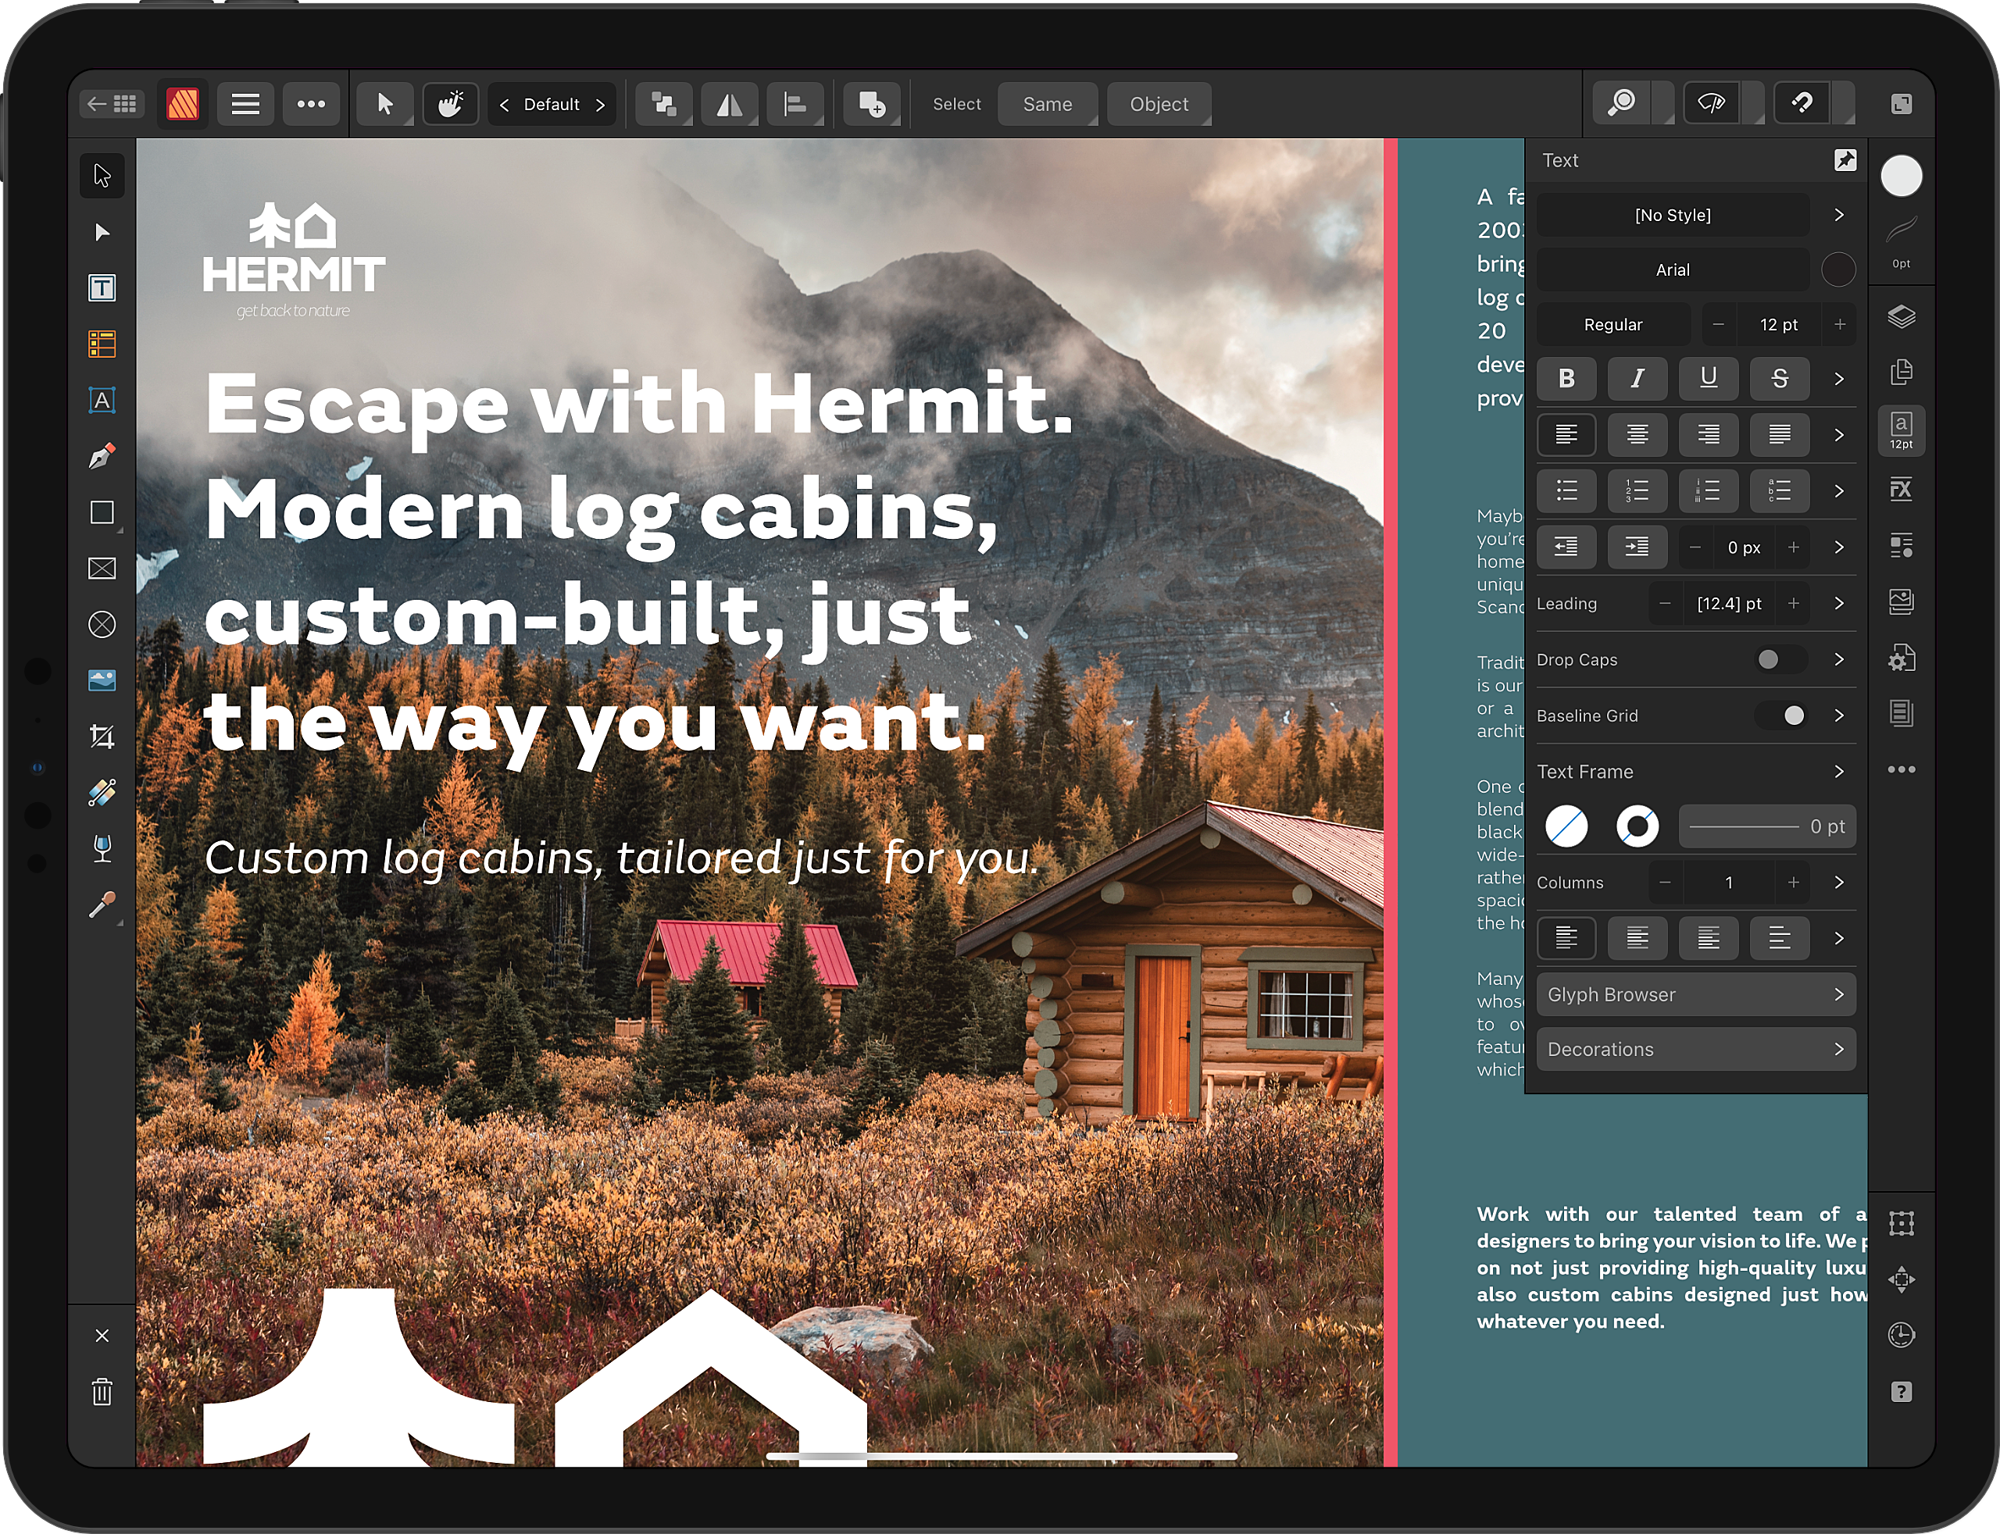
Studio panels
Panels containing more settings are accessed by tapping their icons on the right. At the top right of each open Panel, use the pin to determine whether the Panel stays open or automatically closes while you work in the document view.
Manage the pages of your publication on the Pages Panel and the front-to-back order of objects on pages on the Layers Panel. You’ll use the Layers Panel a lot, so if it’s pinned open, switch to its compact mode to give yourself more room to work on your document.
- Adjustments Panel
- Text Wrapping Panel
- Table Panel
- Anchors Panel
- Hyperlinks Panel
- Cross-References Panel
- Fields Panel
- Toc Panel
- Index Panel
- Notes Panel
- Pinning Panel
- Font Manager Panel
Tools setup
All the essential tools for creating objects on pages are shown on the left.
Press a tool’s letter key to select the tool. Hold a tool’s letter key to use the tool temporarily. Release the key to switch back to the previous tool.
The Command Controller
The Command Controller gives you access to many alternative behaviours for tools and objects. To show or hide it, tap Toggle Command Controller on the Document menu.
Dragging its centre button over one of its four modifier buttons—equivalent to ⌘, Shift, ⌥ and Ctrl on a Mac keyboard—affects actions for as long as it is held there. Or, you can drag to a modifier’s outer edge and then release to lock the modifier on.
For example, you can use the ⇧ (up) modifier to constrain the aspect ratio of an object as it is drawn or transformed, the ⌃ (left) modifier to rotate an object around the opposite handle, and the ⌥ (down) modifier to temporarily disable snapping.
Position the controller wherever you want by long-pressing its centre until it pulses and then dragging it.
Pages
The Pages Panel allows you to add, navigate and rearrange pages, which are displayed as thumbnail previews.
If your document uses facing pages, they are arranged as spreads just like they’ll be when published.
Tapping a thumbnail shows the corresponding spread in the document view, ready for editing.
Artistic Text Tool
The Artistic Text Tool creates stylised typography, such as headlines and pull-quotes.
Dragging on a page provides instant control over artistic text’s initial size. As you do so, the live preview of a letter ‘A’ shows how your chosen font and size will render.
Frame Text Tool
The Frame Text Tool defines areas through which paragraphs will flow.
Tapping within a frame creates an insertion point. You can then type in the frame or long-press on it and select Insert Filler Text to fill it with temporary content so you can preview its layout and formatting.
You can type into frames using the on-screen keyboard or a hardware keyboard, or place Rich Text Format and Microsoft Word files, including any notes and text styles, by selecting the Place Tool.
Text flow
You can link text frames to flow long stories across multiple pages. Text automatically reflows when you add, remove or transform text frames.
Manually link text frames by tapping the triangle on an existing one and then tapping another text frame or dragging to create a new one. Text automatically flows from one linked frame into the next.
Using the shape tools
With a shape tool selected, tapping its icon a second time reveals Affinity Publisher’s full roster of shape tools, which includes the Rectangle Tool, Ellipse Tool and Triangle Tool.
Drag on the page to create a shape. Red control handles on a selected shape can be dragged to customise specific attributes, such as rounding a rectangle’s corners, curving a polygon’s edges, and positioning a callout’s tail.
Making a selection
Select objects directly on pages with the Move Tool by tapping them or dragging out a selection marquee around them. Or, you can select their entries on the Layers Panel.
If you prefer a marquee to only have to intersect an object to select it, use the Command Controller’s ⌃ (left) modifier. You can make this behaviour the default from the Tools section of the app’s settings.
Text is quickly navigated by holding two fingers on the on-screen keyboard and then dragging to move the insertion point. Select a word, line, paragraph or all of a story’s text by tapping it two, three, four or five times, respectively.
You can select discontinuous text ranges, e.g. to style multiple headings at once, using the Command Controller’s ⌘ (right) modifier.
Picture frame tools
With the Picture Frame Rectangle Tool and Picture Frame Ellipse Tool, dragging on the page creates a picture frame that you can fill with a photo, illustration or document by tapping Replace Picture on the context toolbar.
With the Move Tool, framed content is easily scaled using the slider next to the tools on the left, and (after double-tapping the frame) repositioned or rotated by dragging the content or its rotation handle, respectively.
Shapes drawn with a shape tool or the Pen Tool can be used as picture frames by selecting Convert to Picture Frame on the Edit menu.
Autoflow text
You can flow text through however many pages and linked text frames it requires by long-pressing on its frame’s Text Flow triangle, releasing, and then selecting Autoflow.
With your text in place, you can style small parts of it, create paragraph and character styles from those parts, and then quickly apply the styles to the rest of your text.
By using text styles, it’s extremely easy to try out different fonts, font sizes and other settings. As you do so, they’re instantly and consistently applied throughout your publication.
Autoflow images
Affinity Publisher can autoflow multiple images, too. Selecting multiple images via the Place Tool or dragging and dropping them from the Files app loads them onto the Place Panel.
Tap Toggle Multi-Select and then Select All on the Panel (the first and second buttons from the left) and then tap a picture frame or drag on a page. Affinity Publisher will autoflow the selected images into your document starting from that point. Each page remains fully editable after autoflow.
You can autoflow pages from PDFs too, by tapping Show All Pages (the third button from the left) and then Select All on the Place Panel. This allows you to integrate a multi-page supplement or advertisement from a client into your publication in seconds.
Design aids
Numerous design aids are available to help you create strong page layouts.
They include margins, which ensure content doesn’t encroach on the gutter and page edges; baseline grids to vertically align text across spreads; snapping to precisely align objects; and column guides, which support desirable design qualities such as balance and harmony.
Tapping Toggle Preview Mode (near the top right of the workspace) hides these and all other design aids and overlays, instantly giving you a clear look at your publication’s pages.
Also, tapping Hide UI (at the top right) hides Panels and toolbars to maximise your view.
Quick ways to help readers navigate
Use master pages when you want objects to be repeated on multiple publication pages, and combine them with fields for powerful, time-saving effect.
The Cross-References Panel allows you to insert phrases that refer to other parts of your publication. A cross-reference can contain fields that describe attributes of its target, such as its page number, chapter name, or even paragraph text, which Affinity updates as a document’s contents change.
Double-tapping Page Number on the Fields Panel adds a field at the text insertion point. The field displays as # on a master page and as an actual page number on publication pages to which the master is applied.
Tap Sections on the Pages Panel and divide your document into named sections. Then simply insert the Name field (from the Document Sections group) on a master page to display chapters’ names on their pages.
In a multi-page article that’s interrupted by, say, a full-page ad, insert the Next Frame field (from the Continuation group) and Affinity Publisher will automatically help readers continue to the correct page.
Switching Personas
With all three Affinity apps installed, Affinity Publisher’s StudioLink technology seamlessly allows you to use features of Affinity Designer and Affinity Photo without having to change apps and interrupt your workflow.
This is called Persona Switching. It means you can edit illustrations and photos directly on your publication’s pages.
To switch to a different Persona, tap the current Persona’s icon near the top left of the workspace and then select the required Persona from the menu.
Managing resources and sharing documents
The Resource Manager Panel lets you review all the images and documents you’ve placed in your Affinity Publisher document.
The manager indicates whether each resource is embedded, linked or missing. The choice of embedding or linking is made during document creation. Each option has pros and cons but you can change the decision for any resource at any time—including for individual resources.
To share your document, including its resources and fonts (if permitted by your licence), select Package from the Document menu to save copies of them to a folder.
Managing complex publications
Use the Toc (Table of Contents) and Index Panels to add references that help readers navigate and look up information. Preparing your document for these references is as simple as applying text styles and inserting index marks at keywords, respectively.
To provide citations and commentary alongside main text, use the Notes Panel to insert footnotes, sidenotes and endnotes. You also get great control over note formatting and positioning.
Exporting your publication
You can check your publication for problems by using the Preflight Panel, and then export it in the industry-standard PDF format by selecting Export from the Document menu.
Whether you want a press-ready PDF with printer’s marks, one that’s optimised for online delivery, or a PDF/X file for graphics exchange, you can select a built-in preset—or adjust advanced settings to create your own.
See also
For more in-depth learning resources don’t miss:
Credits & Footnotes
- Wooden huts by Mumemories on Shutterstock (Affinity Publisher user interface)
- The skyline of Detroit by harry mtike on Shutterstock (Welcome to Affinity)
- Successful businessman by Pixel-Shot on Shutterstock (Welcome to Affinity)
- Contemporary house by Franck Boston on Shutterstock (Welcome to Affinity)
- Portrait of cheerful content professional worker by Roman Samborskyi on Shutterstock (Welcome to Affinity)
- Young handsome man with beard by Krakenimages.com on Shutterstock (Welcome to Affinity)
- Happy vivacious older blond woman by stockfour on Shutterstock (Welcome to Affinity)
- Portrait of positive young guy by Prostock-studio on Shutterstock (Welcome to Affinity)
- Serious older man in casual by fizkes on Shutterstock (Welcome to Affinity)
- Head shot portrait attractive young Indian woman by fizkes on Shutterstock (Welcome to Affinity)
- Toothy smiling pretty woman by spaxiax on Shutterstock (Welcome to Affinity)
- Portrait of smiling African-American man on Shutterstock (Welcome to Affinity)
- Elderly businesswoman is smiling by spaxiax on Shutterstock (Welcome to Affinity)
- Portrait of happy young Asian woman on Shutterstock (Welcome to Affinity)
- Brilliant by DOCTOR BLACK on Shutterstock (Welcome to Affinity, Autoflow Images)
- Women’s jewelry by Rasulov on Shutterstock (Welcome to Affinity, Autoflow Images)
- Amethyst Pin by Jeffery Mason on Shutterstock (Welcome to Affinity, Autoflow Images)
- Valentines day by CHATCWORLD on Shutterstock (Welcome to Affinity, Autoflow Images)
- Pendant with gem on white by R.Ashrafov on Shutterstock (Welcome to Affinity, Autoflow Images)
- Golden ring by Art of Life on Shutterstock (Welcome to Affinity, Autoflow Images)
- Opal white gem stone on gold ring by papa studio on Shutterstock (Welcome to Affinity, Autoflow Images)
- Gold ring with a large diamond by OKcamera on Shutterstock (Welcome to Affinity, Autoflow Images)
- Bohemian hippie girl in white dress by Antonyshyn Anna on Shutterstock (Welcome to Affinity, Autoflow Images)
- Sterling silver jewellery by Dobromir Stefanov on Shutterstock (Welcome to Affinity, Autoflow Images)
- Chateau Margaux in Bordeaux by Jordi Muray on Shutterstock (Welcome to Affinity)
- 3D render of neo classic home interior by murattellioglu on Shutterstock (Welcome to Affinity)
- Fitness, sport, people and lifestyle concept by Ground Picture on Shutterstock (Welcome to Affinity)
- Full length body size profile by Roman Samborskyi on Shutterstock (Welcome to Affinity)
- Beautiful girl with a clutch bag and sunglasses by Capable97 on Shutterstock (Welcome to Affinity)
- Modern office building in the evening by Mike Mareen on Shutterstock (Welcome to Affinity)
- Fried halloumi by InnaR on Shutterstock (Panels, Autoflow Images)
- 3D building by han871111 on Shutterstock (Pages)
- Cheerful young chef by Friends Stock on Shutterstock (Artistic Text Tool)
- ‘100 Days. 100 Commissions.’ collage sample by Sonia Hensler (Frame Text Tool)
- Snowboarder by FXQuadro on Shutterstock (Text flow)
- Man in sunglass mask by Maxim Blinkov on Shutterstock (Text flow)
- Home project by alphaspirit.it on Shutterstock (Making a selection)
- Man in striped sweatshirt by LightField Studios on Shutterstock (Picture frame tools)
- Silver seal ring with a black onyx stone by Dennis van de Water on Shutterstock (Autoflow Images)
- Acorn Street by Diego Grandi on Shutterstock (Design aids)
- Smart businessman with microphone by smolaw on Shutterstock (Quick ways to help readers navigate)
- Old and used hardback books by Thinglass on Shutterstock (Quick ways to help readers navigate)
- Computer diagnostics by rosedesigns on Shutterstock (Quick ways to help readers navigate)
- Mixed-breed dog by Csanad Kiss on Shutterstock (Switching Personas)
- White Royal Poodle dog by Seregraff on Shutterstock (Switching Personas)
- Ceramic pot by Africa Studio on Shutterstock (Exporting your publication)
- Gold cocktail shaker by Mile Atanasov on Shutterstock (Exporting your publication)
- Empty glass of champagne by Boule on Shutterstock (Exporting your publication)