Affinity Designer 2 (Desktop) Quickstart Guide
Creating a document
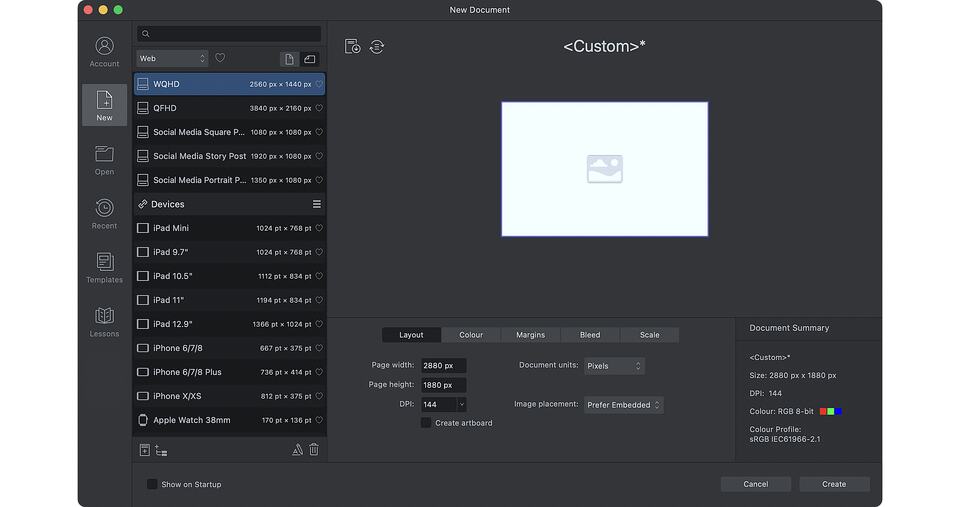
On launching the app, the initial dialog lets you create your document from a preset that sets up your document easily. You can configure:
- Type of deliverable (for print, press ready, photo, web, devices, architectural)
- Page size and orientation
- Page transparency (for PNG web assets)
- Color management settings
- Margins and pro-print bleed
Switching personas
From the top left of your workspace, you can instantly switch between Designer Persona (vector mode) or Pixel Persona (raster mode) all within Affinity Designer itself.
Personas swap your design disciplines in one click, so you could be creating crisp vector-based artwork and then immediately incorporate raster textures, without having to change to a different app, simply by switching to Pixel Persona’s unique brush tools.
Export Persona (object slice mode) offers finer export control by exporting slices made from your design’s objects, groups or layers selectively, all at the same time and continuously as-you-edit if needed. Use this for icon or web graphics design.
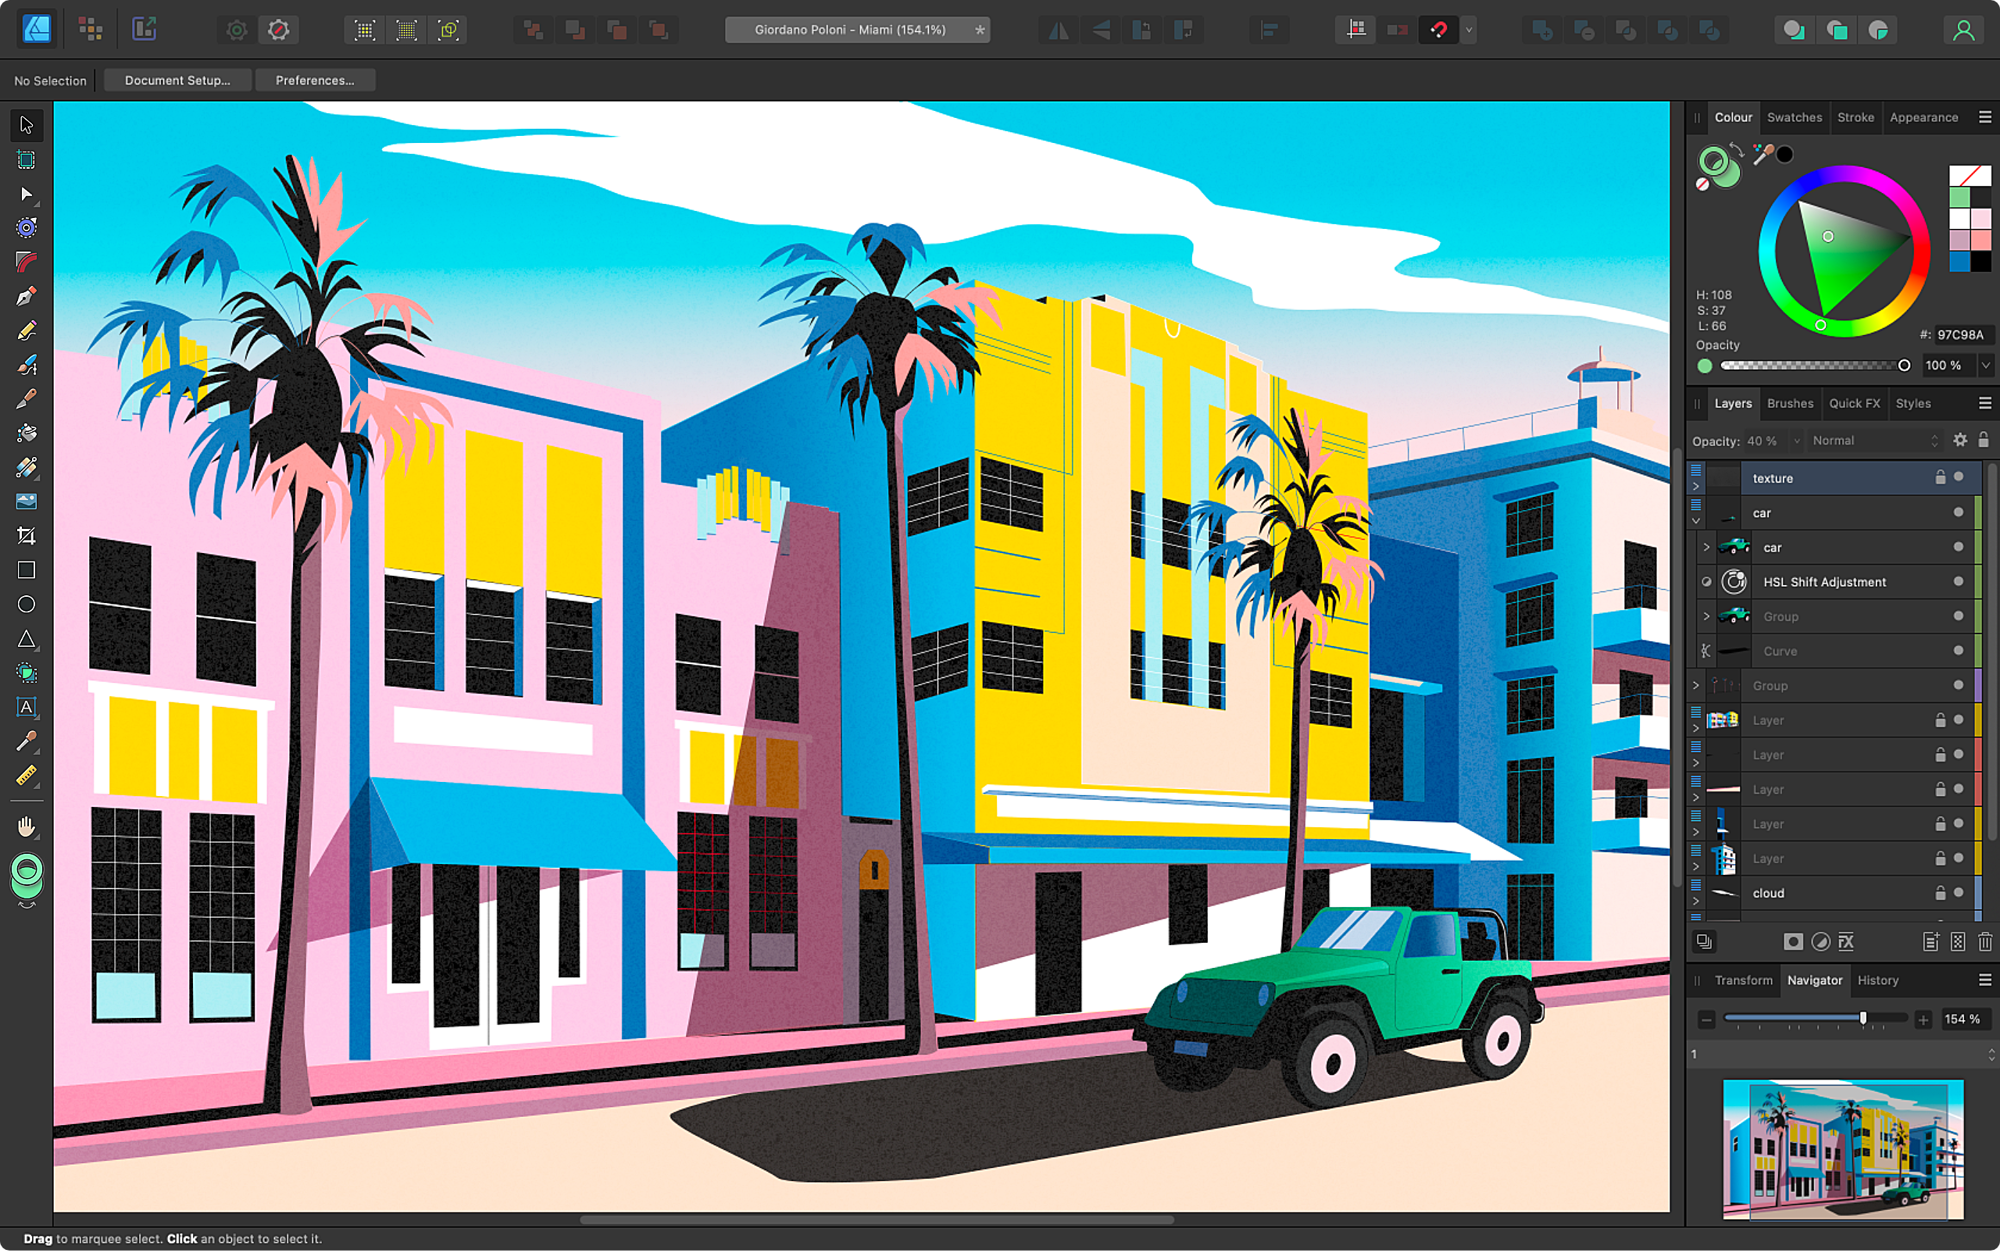
Workspace
All the familiar and essential tools are shown on the left of the screen, most of which have the same keyboard shortcuts you may be used to.
Designer Persona tools
In Pixel Persona, you’ll be offered primarily pixel selection and brush tools instead.
Some tools are concealed within flyouts; to expand, simply click and hold on the tool’s icon to reveal extra tools.
Press a tool’s letter key to select the tool. Hold a tool’s letter key to use the tool temporarily. Release the key to switch back to the previous tool.
The top Toolbar offers commonly used operations, including defaults control, view modes, transformations, Boolean operations and object arranging, as well as snapping, alignment and Affinity account access.
Studio panels
Studio panels (like windows) support your design tools, help to manage your project and offer design aids. A core set of panels are displayed by default to the right of your workspace, while the Window menu lets you switch on or off a full set of panels individually.
Artboards
If you haven’t specified an artboard-based document on document creation, you can convert to artboards using the Artboard Tool at any time. The tool creates artboards based on a preset (e.g., an iPad Pro device mockup), any selected object or the original document size.
Because artboards are independent design areas you can create design variants across multiple artboards. Common design elements across artboards (such as the letter A in the T-shirt example) can be kept in design synchronization by using Symbols. In essence, you create a symbol based on one design element using the Symbols Panel, then duplicate this symbol to other artboards—changes to any symbol instance will then replicate to all other symbolized instances.
Pen Tool/Node Tool for curve drawing/editing
The Pen Tool allows you to plot out a curve by connecting together individually positioned dots, called nodes. These nodes let you reshape your drawn curve in a variety of ways including closing the curve to make an irregular shape.
With the Pen Tool selected, you can adjust how the curve will be drawn by selecting a smooth (Bézier), smart, polygon or straight-line mode on the context toolbar.
Once you have drawn a shape or curve you can adjust it by holding down the ⌘ key (Ctrl key) or jumping to the Node Tool, and then moving a selected node or its off-curve control handles emanating from the node.
You can click on the curve to add a new node, drag on the inter-node curve segment and convert a node to either Sharp (cusp), Smooth or Smart, reshaping the curve in different ways.
Affinity Designer allows for quite complex node adjustment, allowing you to select multiple nodes at once for easy adjustment. Node snapping, advanced alignment options and in-depth corner radius/corner type controls are available too.
Pencil Tool
The tool lets you create freehand drawings that give a natural appearance just like a real pencil’s stroke. An optional Stabilizer feature smoothes your strokes for visually appealing curves and swirls that can remain open or be closed automatically.
Shape tools
Affinity Designer has a vast array of Shape tools available. Pressing M on the keyboard will cycle through Rectangle, Ellipse or Rounded Rectangle Tools instantly, while clicking on the small gray arrow next to the Rounded Rectangle Tool will unveil a long list of alternative shapes.
These additional shapes include the Tear (shown), Double Star, Cog, Cloud, Heart and Donut Tools to name a few.
Importantly, any shape added to the page can be further morphed into a myriad of different shape variants—simply drag the red handle(s) and experiment.
Boolean operations
Booleans are destructive operations that help you create complex shapes from simple shapes that would otherwise be difficult or time consuming to do. Add, Subtract, Intersect, Xor and Divide operations are available from the top Toolbar.
Compounds perform these same Boolean operations but in a non-destructive way, i.e. shapes that have been joined together (e.g., added) can still be transformed independently by simply pressing the Alt key as you apply your chosen operation from the Toolbar.
Shapebuilding
The Shape Builder Tool lets you add simple shapes together to form more complex ‘combined’ shapes. You can also delete areas.
Cutting lines and shapes
In contrast to shape building, you can cut objects up into fragments using the Knife Tool. By drawing a knife cut across any selected item(s) you can reposition, transform, reshape, recolor or delete the resulting fragments. Full, partial or internal splits are possible, and even click-by-click scissor cuts on open curves.
Optional stroke stabilization produces smooth cuts in shapes and text.
Vector Warp
The Layers Panel provides a Vector Warp feature that non-destructively distorts shapes as well as artistic text using quad, perspective, bend or arc presets. A mesh preset also offers unlimited warping possibilities by using a customizable mesh grid to which you add junctions (nodes) which act as warping points.
Isometric drawings
Drawing using parallel-perspective grids (isometric/axonometric) helps you create designs for UI/game design, digital design models and mockups. With the Isometric Panel, you draw objects directly on the grid’s Front, Side and Top planes that will transform to fit the active plane—all from this one panel.
Text tools
Three text types can be created—artistic text, path text and frame text.
- Artistic Text Tool—dragging the tool’s cursor to scale your text for instant sizing control.
- Path text—with the Artistic Text Tool active, clicking over a shape’s outline or curve and typing will create path text that fits the path.
- Frame Text Tool—the tool creates an easily positioned frame containing longer passages of text which will flow without scaling, although you can still scale the text size as an optional extra.
For any text type, use the context toolbar’s font selector to preview your font choice.
Brush tools
Designer Persona’s Vector Brush Tool lays down editable vector brush strokes, while switching to the Pixel Persona gives access to both the Paint Brush and Pixel Brush tools for painting raster content.
Adjusting your stroke’s brush color, width, opacity and blending can be achieved from the context toolbar above your workspace; stroke stabilization can also be enabled for beautifully smooth strokes. The brushes themselves can be edited on the Brushes Panel.
For any brush tool you can either apply pressure-sensitive brush strokes by default when using a graphics tablet or create a curved Pressure chart on the Stroke Panel (set your brush controller to Velocity).
Layers and layer clipping
Layer behavior and concepts are mostly the same as in any graphic design app. Items appearing nearer the top of the Layers Panel appear more to the foreground, while items nearer the bottom of layer stack are more to the background.
One key difference is how you apply clipping. Clipping will position an object inside another—the path of the parent object becomes the new boundaries for the child object. Any areas of the child object which lie outside the parent object’s path are hidden. To clip, drag a layer onto another layer’s layer name.
A popular clipping technique for shading and adding depth is to paint raster textures that automatically clip within just the targeted object, e.g. a lightning bolt. Simply swap to the Pixel Persona and paint with the Paint Brush Tool over the selected object. Optionally, use Erase blend mode to blend with the underlying design.
Another great example would be to clip an image or vector design within artistic text by dragging and releasing the image or design layer over the text layer in the Layers Panel.
Placing documents and images
Place Tool lets you add a wide range of vector/raster images to your page, as well as CAD (DWG/DXF), PDFs or any Affinity document. Simply drag out to scale to size, then reposition in your document. You can also drag-drop an image directly over the canvas to import it.
For placed multi-layout CAD or multi-page PDF documents, you can choose which CAD layout or PDF layer/page is displayed by using the context toolbar.
Adjustments
Over 20 adjustment layers let you change the look of specific objects or layers, even your entire design, via either the Layer menu or Layers Panel. Adjustment layers are non-destructive—if you’re not happy with the results you can modify the adjustment at a later time, reposition it in your layer stack or just delete the layer altogether.
Some popular adjustments include Gradient Map and HSL as shown above, along with White Balance and Brightness and Contrast. In particular, the Gradient Map adjustment maps a design’s grayscales to a specified color gradient so your design looks color-coordinated, while HSL adjustments alters the Hue, Saturation and Luminosity of your design—the latter is often applied during final fine-tuning.
Exporting to different formats
There are various ways to export your documents and a multitude of formats available to choose from. The easiest way to begin your export is by using File>Export, where the dialog lets you select the exported area (if applicable) and access advanced settings via the More option.
Alternatively, you can export using Export Persona, which takes a slice-based approach to the simultaneous mass export of multiple objects, groups or layers.
See also
For more in-depth learning resources don’t miss:
Credits & Footnotes
All graphic design by Matt Searston except:
- Miami by Giordano Poloni (Affinity Designer user interface)
- Thundercat by Ellsphee (Switching Personas)
- Underwater world by Ardea-studio on Shutterstock (Pencil Tool)
- Blockland by Daniel Rotter (Text tools)
- Spark Identity by Frankentoon (Brush tools)
- Floorpan by Free_styler on Shutterstock (Placing documents and images)
- Home project by alphaspirit.it on Shutterstock (Placing documents and images)